Get an email when there's a new version of NVIDIA Jetson
| Name | Modified | Size | Downloads / Week |
|---|---|---|---|
| Parent folder | |||
| README.md | 2023-03-14 | 1.6 kB | |
| Totals: 1 Item | 1.6 kB | 0 | |
How to use GPIO on reComputer J202
Step 1: Open the datasheet of J202
Step 2: Navigate to the section 40 Pin Expansion Header - J10
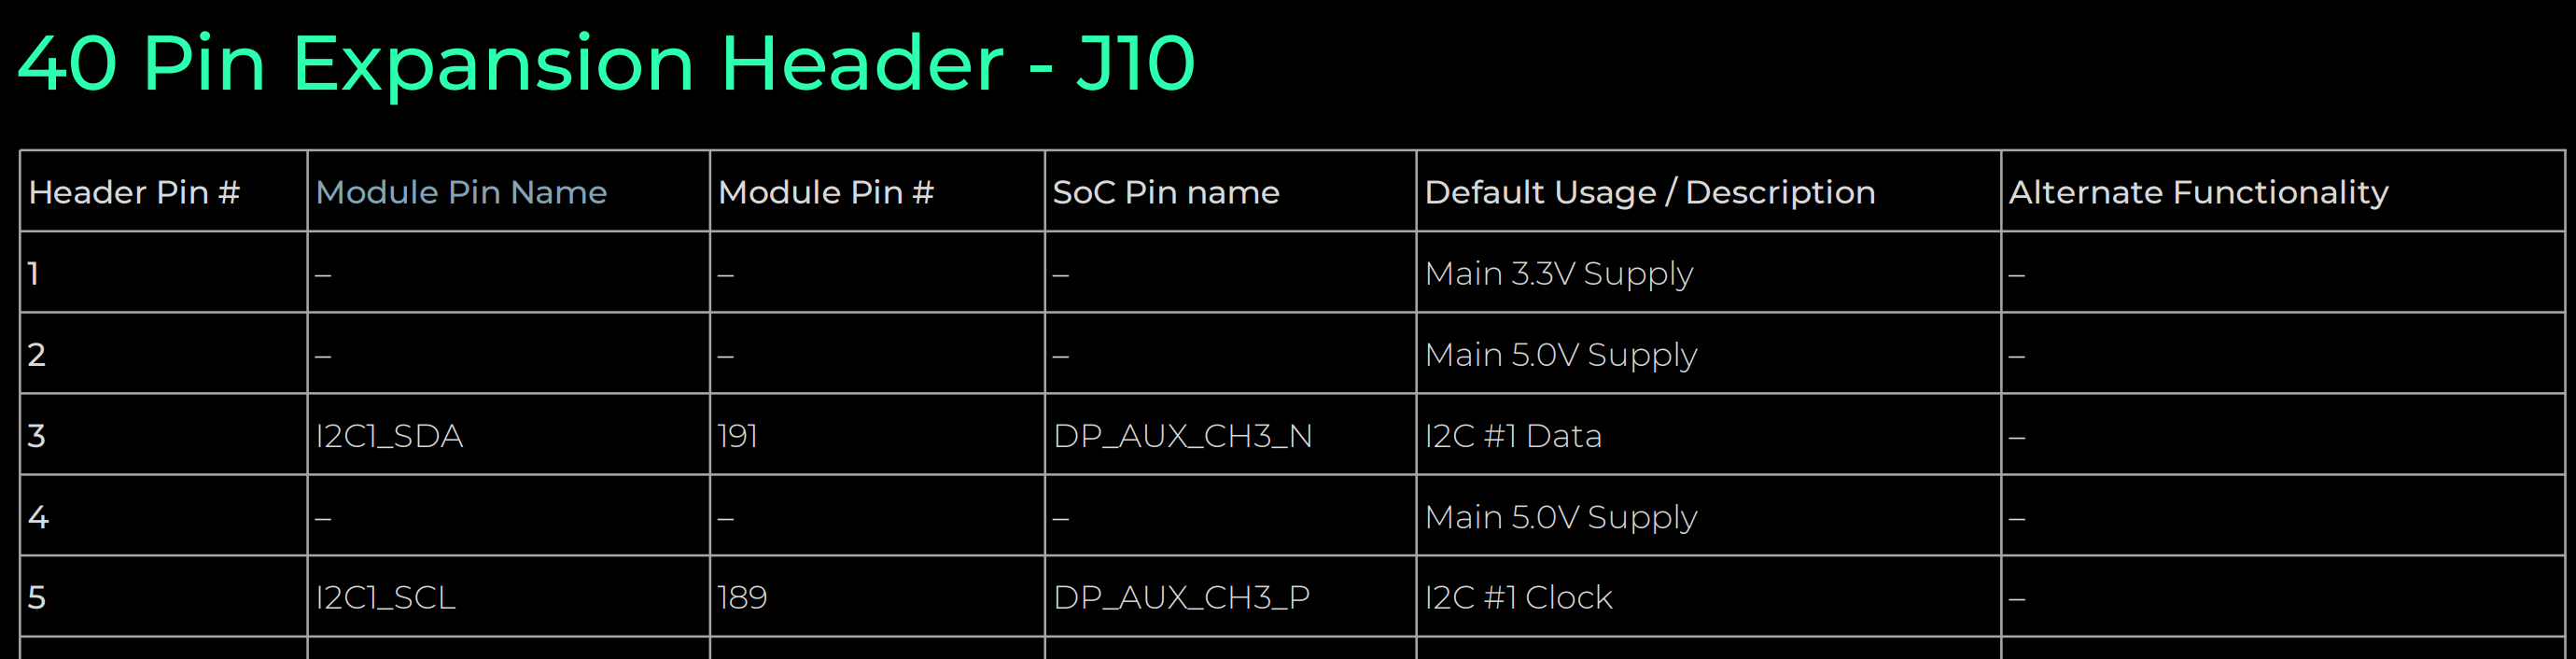
Step 3: Find the name of the Header Pin # making sure it's default usage is GPIO under the Default Usage / Description column
For example, check Header Pin 15. It's Default Usage is GPIO

Step 4: For the same pin, find the name under Module Pin Name column. In our example, it is GPIO12
Step 5: Enter the terminal of the Jetson device and execute this command
cat /sys/kernel/debug/gpio
Step 6: Find the GPIO number corresponding to the Module Pin Name that we got before
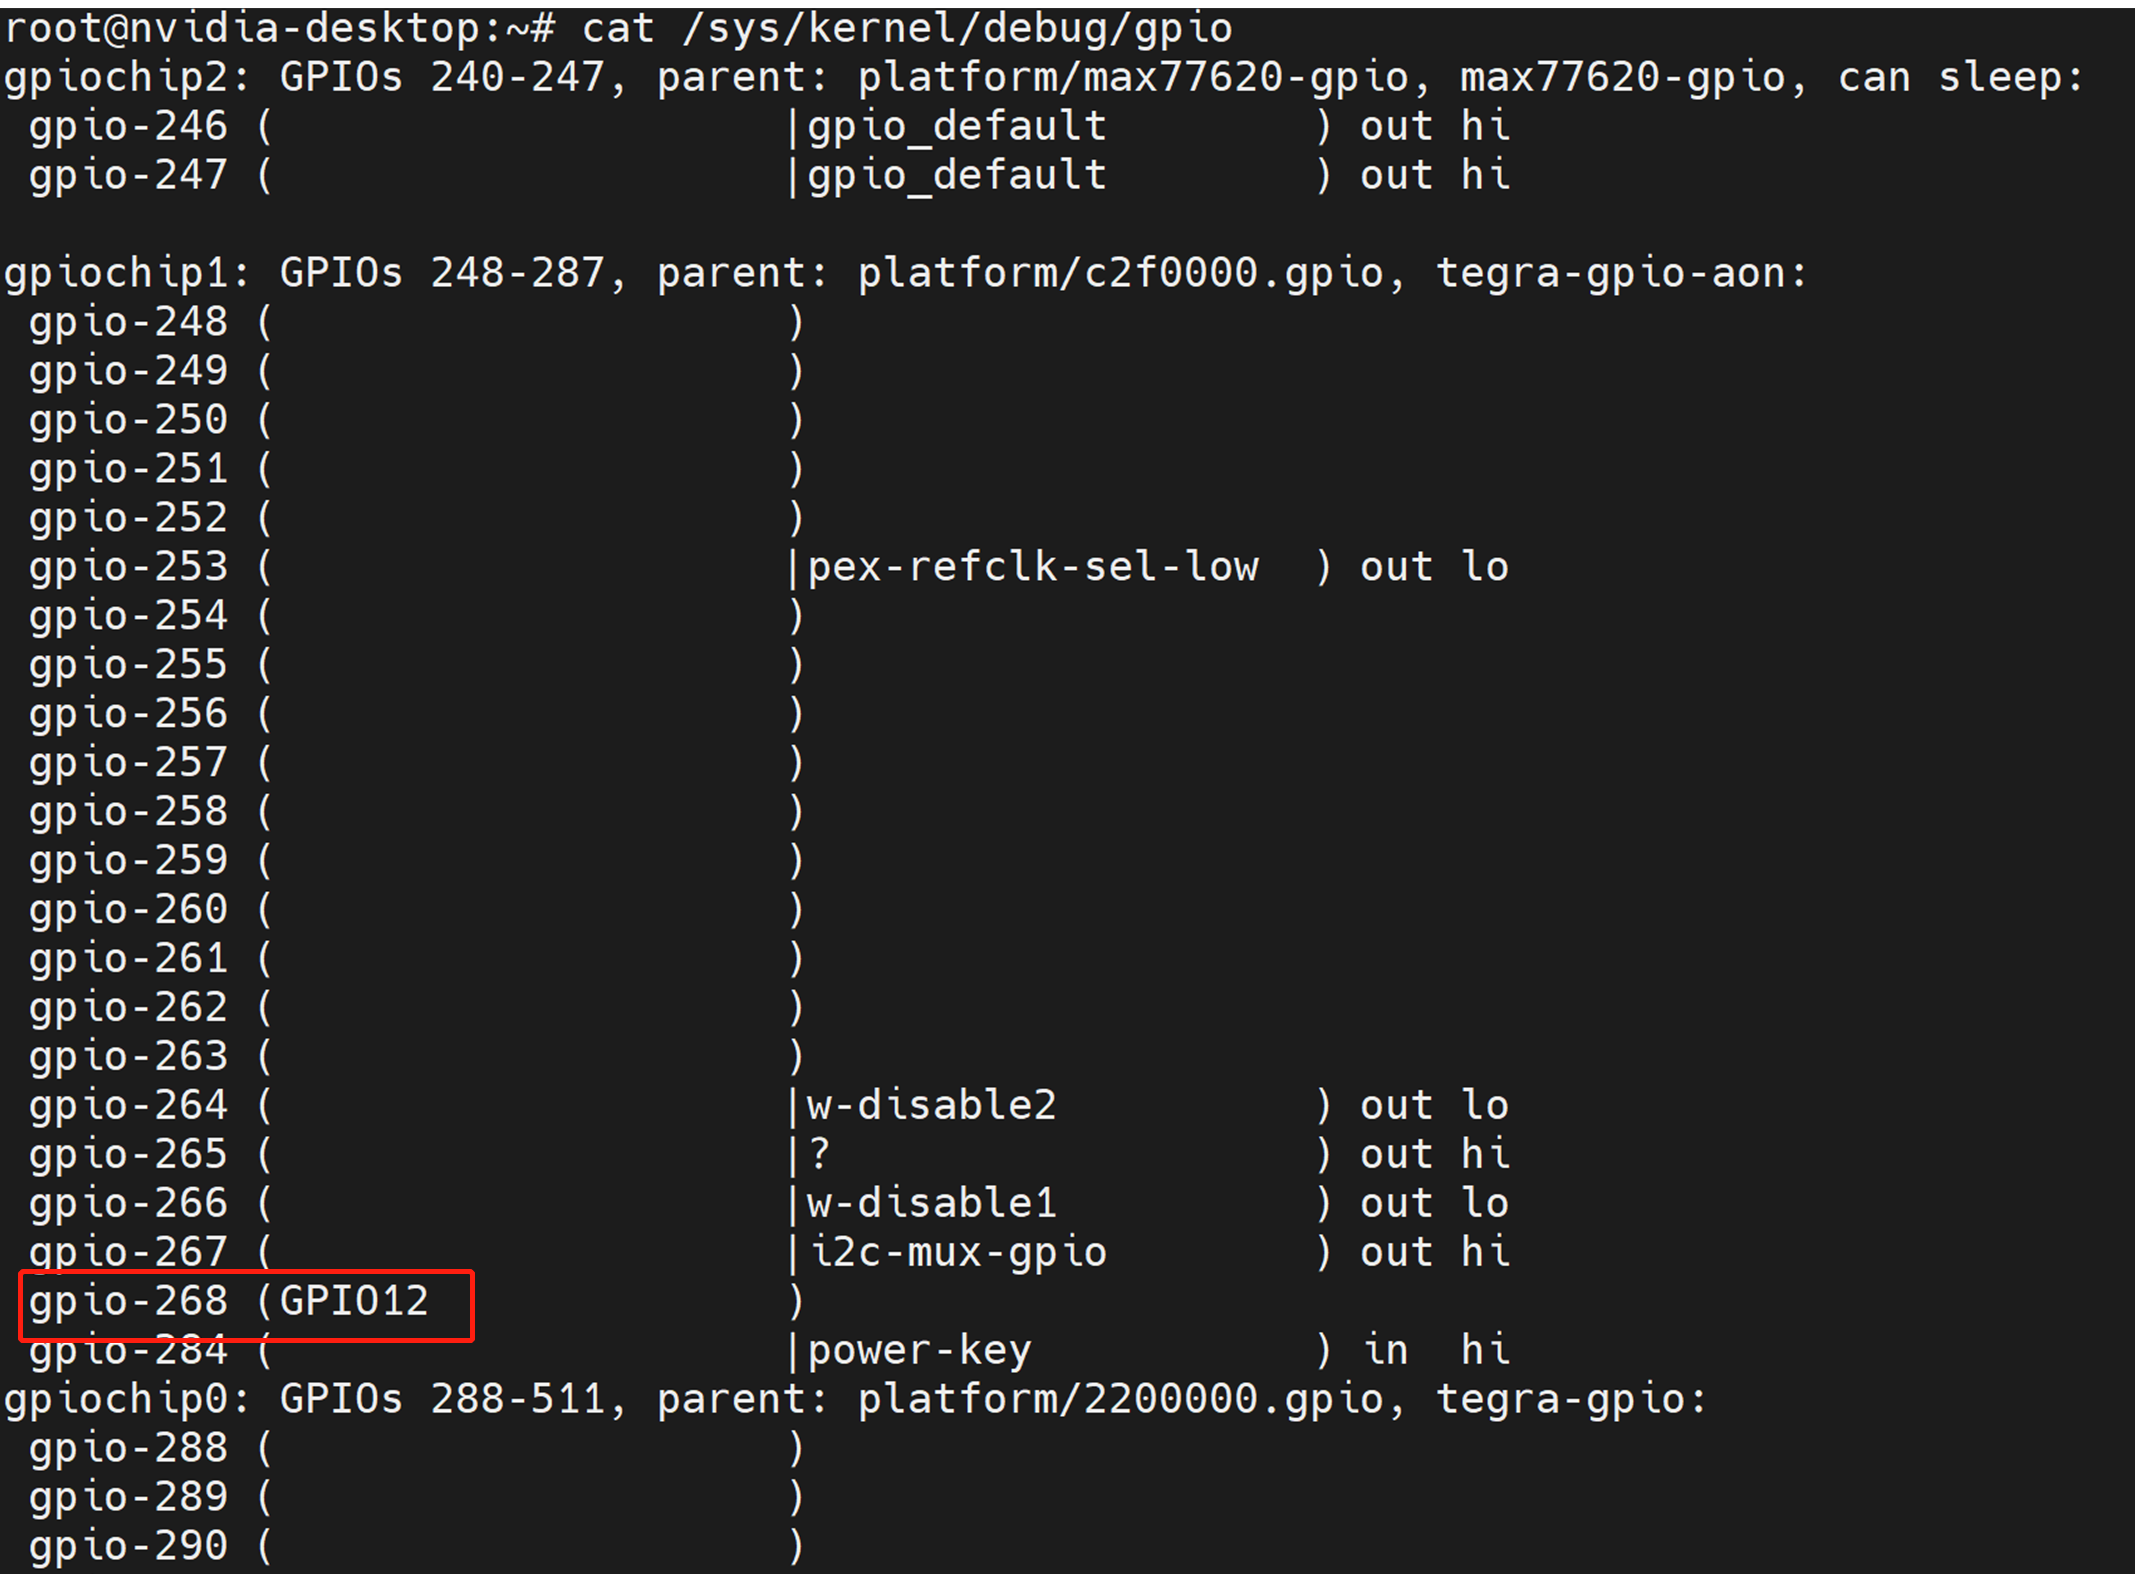
In this case, it is gpio-268 corresponding to GPIO12
Step 7: Execute the following inside the terminal to export gpio-268 pin
sudo -i
cd /sys/class/gpio
echo 268 > export
Step 8: Set the direction and set the value. Here direction can be in/ out and the value can be 0/ 1
For example, to set GPIO12 to HIGH
cd gpio268
echo "out" > direction
echo 1 > value
To set GPIO12 to LOW
echo 0 > value
