create a project
Creating a project
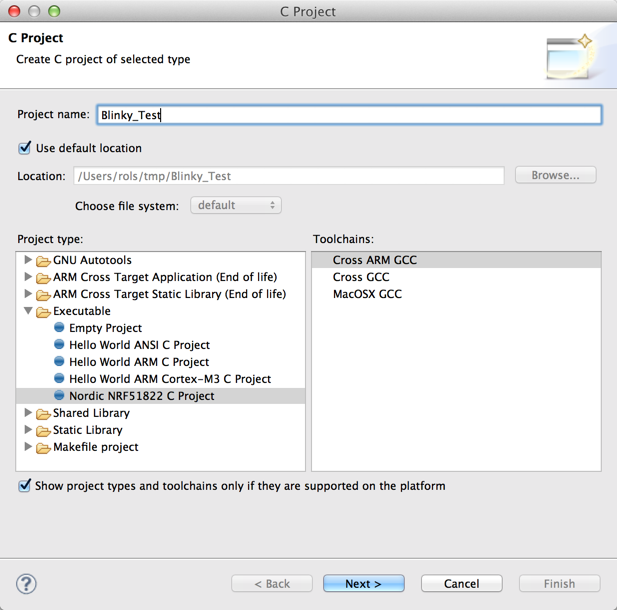
To create a project first select the 'New C Project' from the menu and choose the 'Nordic NRF51822 C Project' entry and 'Cross ARM GCC' and give the project a name, a name without spaces.

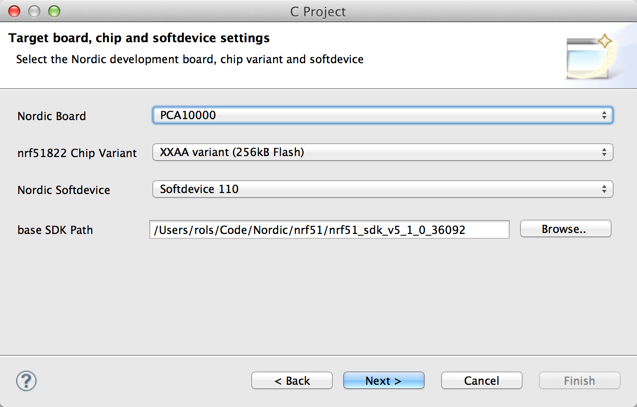
The next dialog allows you to choose basic settings for your project, select your board and chip type, browse to the root of the installed SDK. The SDK path will be put into the includes in the project. Selecting the correct chip and softdevice type will choose the correct linker scripts.
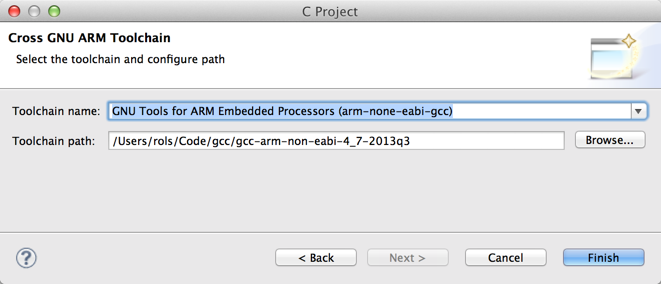
The next few screens choose directories and some other standard options, you would normally click through them until you get to the GNU Toolchain screen. Here you browse to the root of the GNU ARM toolchain you specified.
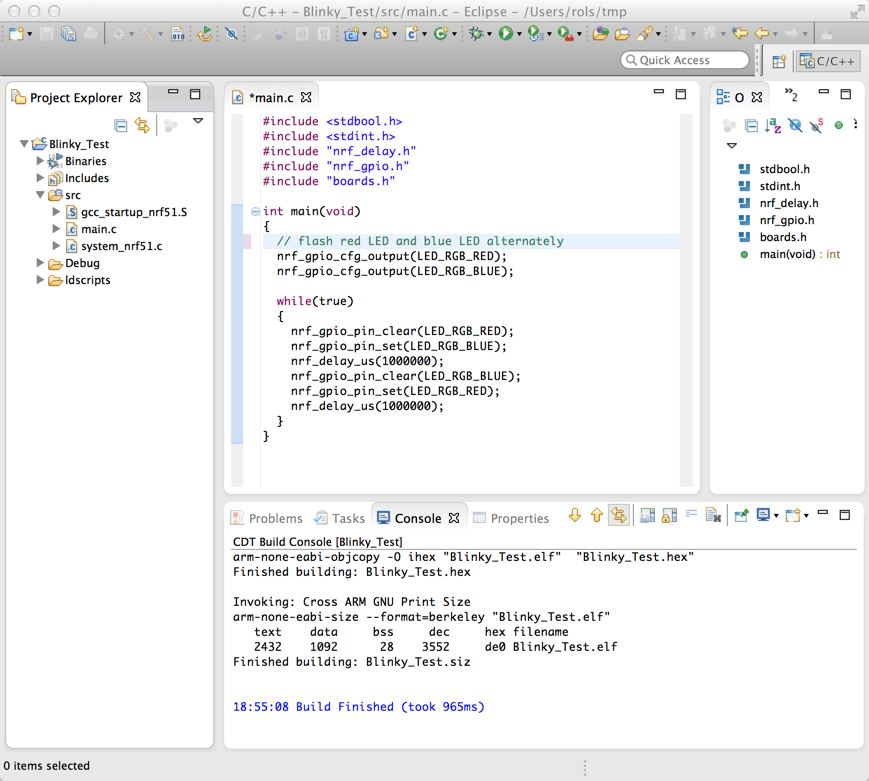
Finally after you click Finish and let the template build the files you will end up with a simple project configured to build a blinky sample.⌘B builds it. You can now start adding the source code you want for your project.