OS
Live Raizo
Linux
- Linux Debian Trixie backport 64 bits
- Kernel : 6.19.11+deb13-amd64
The main tools
- Servers
- DHCP, DNS : dnsmasq
- FTP : proftpd
- tFTP : tftpd-hpa
- SSH : openssh
- Samba
- HTTP : module http.server of python3
- VNC : TigerVNC
- Network protocol analyzer : Wireshark 4.4.14
- Serial port communications programs :
- Web Navigator : Firefox 140.10.0esr
- PDF Reader : use Firefox
Network simulators
- GNS3 2.2.59.dev2
- GNS3 Web UI v2.2.58
- dynamips 0.2.24 : emulator of router / provided without any IOS
- VPCS (Virtual PC Simulator) 0.8.3
- QEmu 10.0.8 with the VM Debian
- Docker version 29.4.1, build 055a478 with the image DDebian
Device QEmu "Debian"
Linux
- Linux Debian Bookworm backport 64 bits.
- Kernel : 6.19.11+deb13-amd64 (lightened)
- The installed softwares are similar to the ones of NetKit.
- Several services (isc-dhcp-server, bind9, freeradius, openvpn ...) are already downloaded but not installed. You can install them (apt install/apt-get install/aptitude install) without accessing to Internet for that.
- Should it be needed, additional software can also be installed (as with a real Debian Linux) in order to enable particular features that are required for specific experiments.
Device Docker "DDebian"
- It is the same as the device QEmu "Debian" except :
- If the GNS3 project is close, only the folders "/root", "/etc/network" and "/opt/raizo/keep" are saved. You can add others folders
- The name of interfaces is "eth"
- You can't load kernel modules
- The command "reboot" is disable
- For virtual Wifi, you must use fast-wifi-docker instead of fast-vwifi, vwifi-client
Added
Commands
On Live-Raizo and the Debian VMs
Only on Live-Raizo
- Add-to-GNS3.sh (sourceforge.net) : API to add VM to GNS3
- fast-backup-lab : To backup a GNS3 project.
- fast-battery: To display the percentage of energy remaining in the battery.
- fast-clean-crash-gns3 : To kill all the processes used by GNS3 (in case of crash for example)
- fast-gns3-server : To start gns3server
- fast-http : To start a web server on the port 80 and share by default the directory "/home/user"
- fast-memo: To display a reminder.
- fast-mount-usb : To mount the USB key in the directory /media/usb0
- fast-nat: To configure an DHCP and DNS servers and use NAT with network of the interface virbr0.
- fast-reset-vm : To reset the Virtual QEmu Machines
- fast-rescan-interfaces : To scan to detect new plugged network interfaces
- fast-restore-lab : To restore a GNS3 project, which has been saved.
- fast-save-project : Asks questions to save quickly a GNS3 project.
- fast-startup : To mount automatically the USB key in /media/usb0 and to processe the script /media/usb0/raizo.sh
- fast-vwifi-update-gns3 : To update the server "vwifi" with the geographical coordinates of each VM from GNS3
- fast-wifi-docker : To add the wlan interfaces to the Docker VMs
- minicom-usb : minicom uses the USB adapter
- cu-usb : cu uses the USB adapter
- ftp : Overlay to lftp so that the login is interactive
Only on the Debian VMs
Configuration files
On Live-Raizo and the Debian VMs
- Colorized outputs of networks commands : tcpdump, ip, ifconfig, route, arp, ...
- Colorized commands in the prompt of zsh
- For nano, a syntax highlighting for the configuration files
- For vim, a syntax highlighting for the file /etc/network/interfaces
- history command already contains useful commands
Only on Live-Raizo
- minicom of Raizo is configured to get connected to the serial port. minicom-usb (or "minicom USB") allows to use USB adapter.
- cu of Raizo is configured to colorize Cisco output. cu-usb allows to use USB adapter.
- A symbolic link "/ftp" to the directory "/srv/ftp", and the alias name "ftp" for the service "proftpd"
- A symbolic link "/tftp" to the directory "/srv/tftp", and the alias name "tftp" for the service "tftpd-hpa"
- Xterm : use "WINDOWS+ARROW_UP"/"WINDOWS+ARROW_DOWN" to increase/decrease the size of the font
On GNS3
- Basic configuration files in "/home/user/.config/GNS3/configs/" for
- Cisco routers : Raizo_ios_base_startup-config.txt
- Cisco EtherSwitch : Raizo_ios_etherswitch_startup-config.txt
- Cisco switch IOU : Raizo_iou_l2_15.2d_base_startup-config.txt and Raizo_iou_l2_15.6.0.9S_base_startup-config.txt
- VM Linux : Raizo_vbox_linux_startup-config.sh
- GNS3 colorizes the outputs of VM's console where the variable "usage" contains "ConsoleType=Cisco"
- The tools menu contains access to commands :
- Docker VM have the shared folder "/hosthome" to access to "/home/user" of LiveRaizo
Only on the Debian VMs
- For tmux
- the shortcut "CTRL+ARROW" allows to change terminals quickly,
- the shortcut "SHIFT+ARROW" allows to change order of terminals quickly
- new pane uses the current path of the pane
- Only with the template "Debian" : the shortcut "CTRL+B S" to adapt the size of the tmux console to the size of the console
- The folder "/etc/apt/sources.list.d/" contains the files :
The specifics
Of Live-Raizo and the Debian VMs
- No server is started automatically at boot
- Default shell of root and user is zsh (bash is also available)
- See which network interfaces are plugged : "!3" or "sudo ifplugstatus -a"
- Set dynamically an IP address : "!1" or "fast-ip dhcp" or "sudo ifup ens3"
Of the Debian VMs
- You are automatically logged in with the "root" account
- The password of root is root
- A simple user exists : his login is "user" and his password is "user". His default shell is bash, and it is not in sudo group
- An administrator user exists : his login is "admin" and his password is "admin". His default shell is bash, and it is in sudo group
- The VM have access to the directory “/home/user” of Raizo by using their directory "/hosthome"
- After having started up, the hostname of each VM will automatically take the name that was given in GNS3
- IP Forwarding is enabled by default
- At the end of the boot, the VM executes
- the script "/home/user/.STARTUPFORALLVMRAIZO"
- next, the script "STARTUPFORALLVMRAIZO" and after the script with the same name of the VM. These scripts must be placed on LiveRaizo in the sub-folder "project-files/startup/" of your project
- Example of "/home/user/.STARTUPFORALLVMRAIZO" to use vi instead of nano as editor :
new_editor=/usr/bin/vim.basic
if [ "$(readlink /etc/alternatives/editor)" != "${new_editor}" ]
then
        sudo update-alternatives --quiet --set editor ${new_editor}
fi
Of Live-Raizo
- You are automatically logged in with the "user" account
- To start the Windows Manager, you must run the command "startx"
- The password of "user" is "user". You must use "sudo" (or "sudo su") to start commands as root
- At boot, all detected networks interfaces are activated (but not configured), and they will stay activated even if you use ifdown. If you want shutdown a network interface (enp0s0, for example), you must do : "sudo ip link set down enp0s0".
- At boot, a bridge interface, named virbr0, is created : useful if you want to do communicate your virtual network with "Live Raizo"
- Before install Debian Package, you must do : "sudo apt update"
- X starts automatically fast-battery if battery detected
- On Firefox, "Auto-detect proxy settings" is enable by default. Don't forget it if you want to use Firefox with you virtual network.
- Firefox uses the certificats of Debian. You can found them in /usr/share/ca-certificates
- Docker is configured to be used in GNS3. If you want to use Docker VM without GNS3 (docker build, docker run...), you must do :
sudo mv /etc/docker/daemon.json /etc/docker/daemon.json_No
sudo systemctl restart docker
- On X
- ALT+F1 starts xterm
- ALT+F2 starts GNS3
Your Customization
Persistence of /home
- During boot, if Live-Raizo finds a partition with the label “persistence” and the file persistence.conf with "/home" on the root, this partition is automatically mounted in /home. (cf 10.3 Persistence )
- Advice : Don't forget to erase your persistent user's home if you update "Live-Raizo"
Customization of Live-Raizo
Tips
Simulate Virtual Wifi
Sharing between the Host and your guests
Microsoft Guest
With Samba
To share folder
- On Liveraizo, start Samba
sudo systemctl start smbd
- On GNS3, connect a device "LiveRaizo" (to interconnect with the interface virbr0)
- On the Guest, go to "\\IP_of_virbr0"
With Spice
To share screen and mouse
You can use Spice :
- In GNS3, the device must use "spice+agent" as console type
- On the Guest, you must install spice (spice download) : spice-guest-tools
To share folder
You can use "Spice WebDAV daemon" :
- In GNS3, the device must use "spice+agent" as console type
- On the Guest, you must install the "Spice WebDAV daemon" of spice (spice download).
- On my tests,
- spice-guest-tools must be installed before
- After the install of the "Spice WebDAV daemon", you should perhaps start/restart the service "Spice webdav proxy"
- In the preference of the remote-viewer, you must enable the shared folder
Linux Guest
To share screen and mouse
You can use Spice :
- In GNS3, the device must use "spice+agent" as console type
- On the Guest, you must install spice : spice-vdagent xserver-xorg-video-qxl
To share folder
With spice
- In GNS3, the device must use "spice+agent" as console type
- On the Guest, you must install "Spice WebDAV daemon" of spice : spice-webdavd
- In the preference of the remote-viewer, you must enable the shared folder
With 9p
- In GNS3, you must add this in the QEmu options of this VM (With Add-to-GNS3.sh (sourceforge.net), you can use the read-only variable : OPTION_QEMU_9P_HOSTHOME)
-fsdev local,id=fsdev0,path=/home/user,security_model=none,multidevs=remap -device virtio-9p-pci,fsdev=fsdev0,mount_tag=hosthome
- In the VM, the shared folder "/home/user" of the Host can be mounted in /mnt :
mount -t 9p hosthome /mnt
Install on USB Key
From Microsoft
- To install Live-Raizo on USB Key, i recommand to use :
- imageUSB (version v1.4.1003) to install Live-Raizo on multiple USB drive.
From Linux
dd  if=Live-Raizo-v15.24.01.07i.iso  of=/dev/sdX
# with /dev/sdX, the device of your usb key
Use in a Hypervisor
Sharing between virtual and real network
-
To do communicate your virtual network with the real network (screenshot)
- On GNS3, put a "Cloud" device and a cable to the attribute "enp0s0" of this "Cloud" device.
- (If the real network is accessible by enp0s0)
-
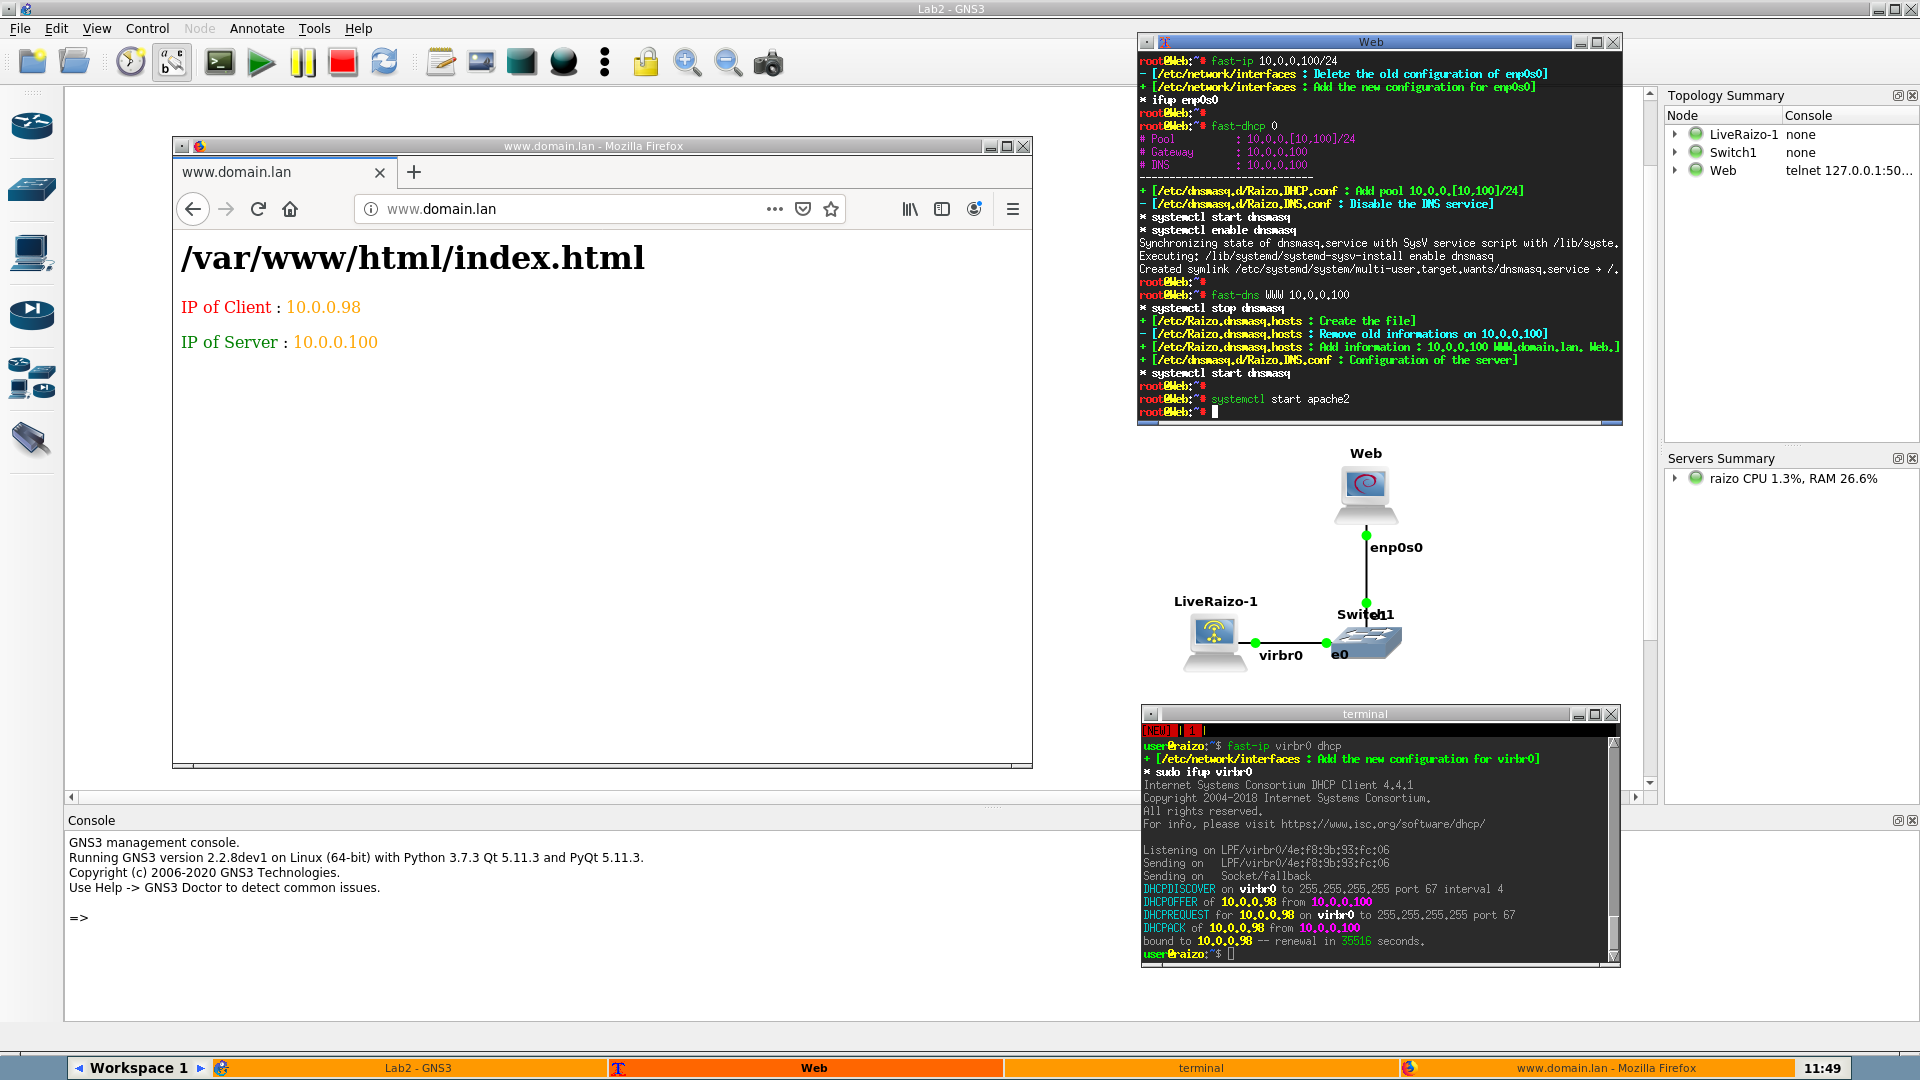
To do communicate your virtual network with Live-Raizo : (screenshot)
- On GNS3, put a "LiveRaizo" device and a cable to the attribute "virbr0" of this "LiveRaizo" device.
- On Live-Raizo, give an IP address to the virbr0 interface.
-
To do communicate your virtual network and the real network with the Wifi :
- On GNS3, put a "LiveRaizo" device and a cable to the attribute virbr0" of this "LiveRaizo" device.
- On Live-Raizo :
- Configure your Wifi
- Launch "fast-nat" command.
Use bittorrent to access to remote harddisk
Use an external disk to extend the memory
- If "/mnt/disk" mounts an external disk, you can do this before starting GNS3 :
# Create au subfolder in /mnt/disk/ which will contain the projects of GNS3
mkdir -p /mnt/disk/projects_gns3
# Create the folder used by GNS3 for these projects
mkdir -p /home/user/projects
# Associates the folder on the disk to the folder used by GNS3
sudo mount --bind /mnt/disk/projects_gns3 /home/user/projects
- Your projects are actually stored in /mnt/disk/projects
- To stop the association :
sudo umount /home/user/projects
Drawbacks
- You should not move the USB key of Live-Raizo when it is running. If you see "Input/output error" when you launch a command (or fast-syslog), it's too late and you must reboot. Sorry
- In the VM "Debian", tmux cannot detect the size change of the screen. You can :
- say to tmux to recalculate the size of the console : CTRL+B S
- or detach tmux (CTRL+B D) and re-attach it (tmux a)
- On some laptops, during the boot with the SecureBoot enabled, LiveRaizo does a kernel panic : add the boot option "trace_clock=local" on the boot kernel options
- On some laptops, LiveRaizo or X server doesn't start, then you can try :
- If you have an NVidia card, add the boot option "nouveau.modeset=0" on the boot kernel options
- On the boot kernel options, add the option "acpi=off"
- On the boot kernel options, add the option "nomodeset"
- unplugged the power cord of battery before to start X. You can plugged it after
- If Live Raizo hangs after few minutes, verify that the file /var/log/syslog doesn't grow up excessively. If it is the case, seeks in this file the error that the system logs too often and corrects it.
- For example, add the boot option "pci=nomsi" on the boot kernel options
- On processor "AMD Ryzen", to run Microsoft VM with QEmu (GNS3), you must add the option "-cpu EPYC" to the options of the VM
Others
Minimal linux commands useful
Links
