Menu
▾
▴

Documentation
1) Overview
The Database Organizer was developed to help on MySQL database management. The user can configure the database information as: host, username and password and with one click connect and show all tables stored on the database. The application is to help people that have web pages with dynamic content stored on a database. For example, web pages with “News” field that often needs to be updated by people with no knowledge of PHP or MySQL, the application can be used to manage the content without knowledge about what it is happening on background.
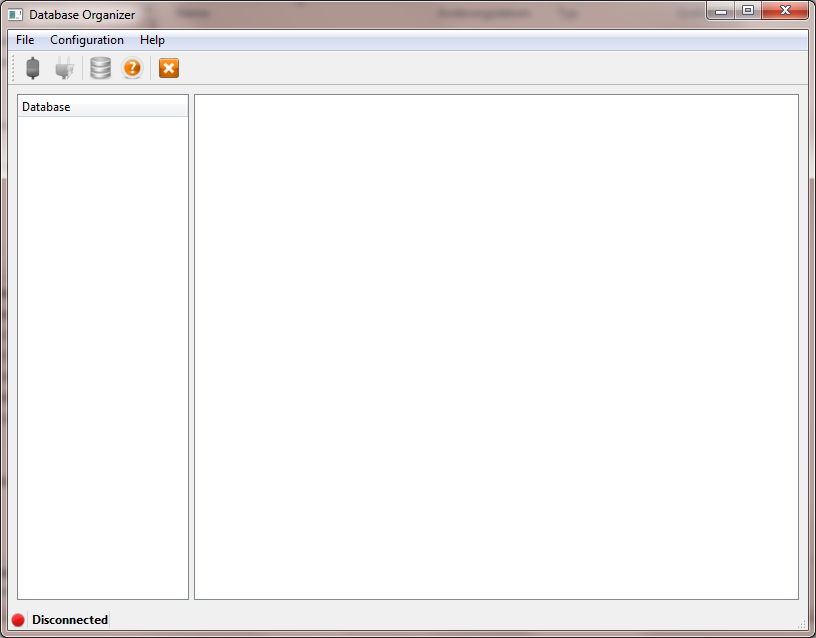
The menu bar has three options:
•   File;
    •   Connect;
    •   Disconnect;
    •   Exit.
•   Configuration;
    •   Connection.
•   Help;
    •   Help;
    •   About.
2) Getting Started
2.1 First Step – Configuration
The user needs to go on menu Configuration and press on Connection or on the menu bar symbol (third from left to right); the configuration dialog will open.
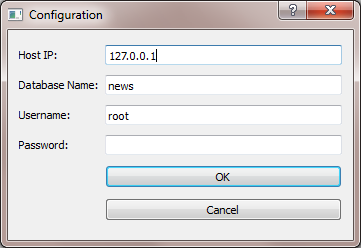
The user needs to configure the connection, adding Host IP, Database Name, Username and Password*, after all entries done, press OK.
*. If there is no password to connect to the database, leave password field empty.
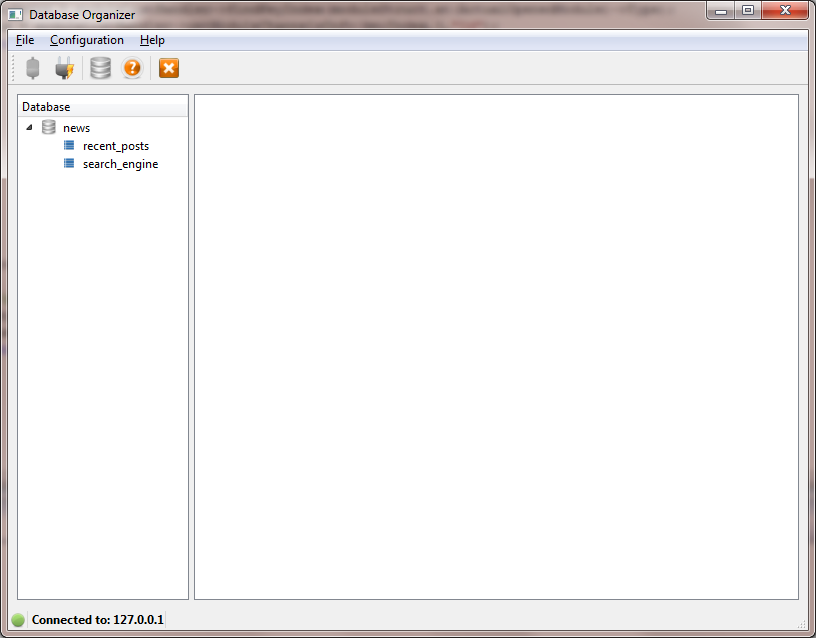
2.2 Second Step – Connect
After the configuration is done the user can press on Connect on menu File or on the menu bar symbol (first from left to right). If all the fields were filled up right the software will show a green ball with host IP on the left bottom part and the database tables on the white space on the left side of the window.
2.3 Third Step – Updating the Database
The user needs to double click (left mouse button) on the table he wants to update. The update options are: Add new Entry, Remove Entry and Save Modification. After double click on the table, the entries will be shown on the white space right side of the application window.
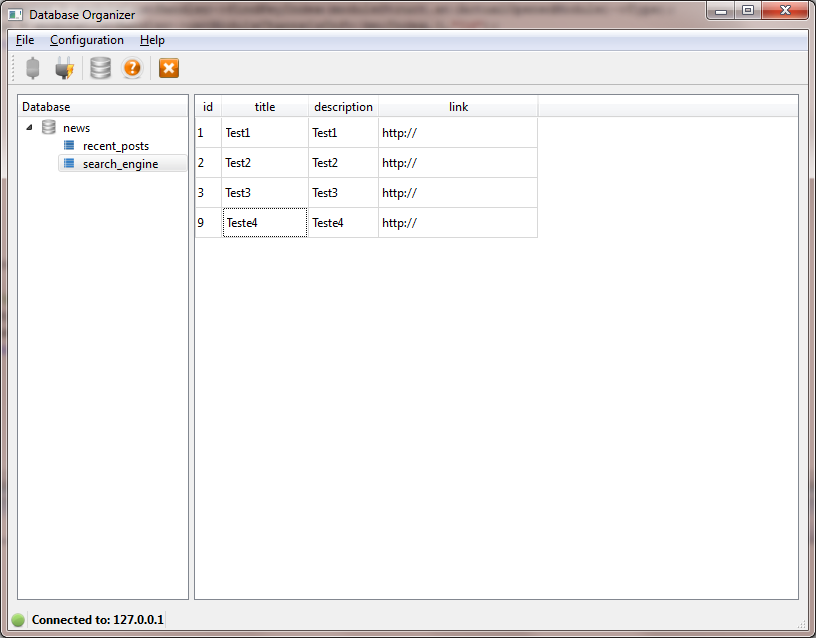
The user can click with right mouse button to show the options.

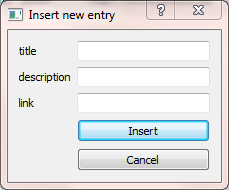
2.3.1 Add new Entry
The Add new Entry option will open a dialog where the user can add the new information. After Insert is pressed the new entry will be stored on the database.
2.3.2 Remove Entry
The user can click with the right mouse button on the line he wants to delete from database and goes to the option Remove Entry, after clicks the line and the database entry will be deleted.
2.3.3 Save Modification
The user can modify one or more existing entries. He needs to double click (left mouse button) on the field he wants to update and then writes the new values. He can modify all fields he wants and after all modifications are done he uses the right mouse button click to open the context menu and select Save Modification. The application will update all fields on the database.
3 More Information
For more information you can visit our website http://www.rochacardoso.de.
Project Members:
- César Rocha (admin)
